
服务部署
—
01 服务器配置
配置详情
GPU:8*3080TI服务器 (一块24G显存的卡就可以了)
CUDA:12.1
02 环境安装
cat requirements.txt(python38) root@-NF5468M5: cat requirements.txt
torch>=1.10
bmtrain>=0.2.1
jieba
tqdm
tensorboard
numpy>=1.21.0
spacy
opendelta为了避免cuda环境和pytorch版本的冲突,一个个进行安装。
1)安装pytorch,适配cuda12.1
参考:https://pytorch.org/get-started/locally/
注意:使用cuda安装比较慢,所以用pip3安装
pip3 install --pre torch torchvision torchaudio --index-url https://download.pytorch.org/whl/nightly/cu121pip install bmtrain3)安装其他环境
pip install jieba tqdm tensorboard numpy spacy opendelta03 模型下载
下载地址:https://huggingface.co/openbmb/cpm-bee-10b/tree/main
1)代码克隆
git clone https://github.com/OpenBMB/CPM-Bee.git2)下载模型 19G
下载路径: ./model下载路径,自定义即可

04 测试
1)修改测试文件
修改 vi text_generation.py
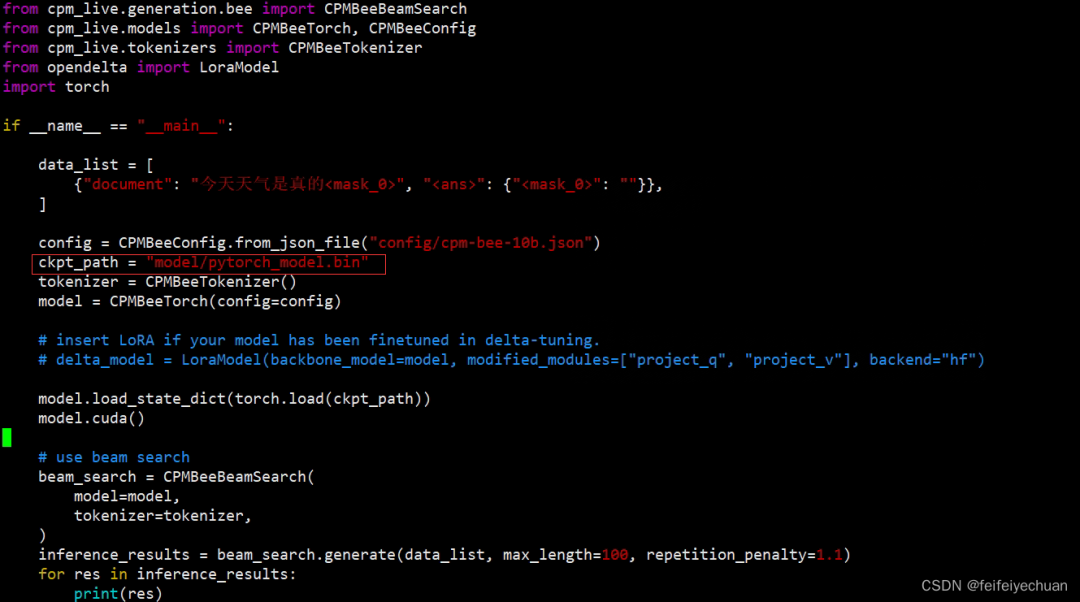
更改模型路径
2)测试模型
python text_generation.py05 接口设计(Python版)
1)新建Flask接口
vi flask_server.pyfrom flask import Flask, request, jsonify
import threading
import torch
from cpm_live.generation.bee import CPMBeeBeamSearch
from cpm_live.models import CPMBeeTorch, CPMBeeConfig
from cpm_live.tokenizers import CPMBeeTokenizer
from opendelta import LoraModel
from flask_cors import CORS
import os
os.environ["CUDA_VISIBLE_DEVICES"] = '6'
app = Flask(__name__)
CORS(app)
# 加载模型
config = CPMBeeConfig.from_json_file("config/cpm-bee-10b.json")
ckpt_path = "model/pytorch_model.bin"
tokenizer = CPMBeeTokenizer()
model = CPMBeeTorch(config=config)
model.load_state_dict(torch.load(ckpt_path))
model.cuda()
beam_search = CPMBeeBeamSearch(
model=model,
tokenizer=tokenizer,
)
# 创建线程锁和计数器
lock = threading.Lock()
counter = 0
MAX_CONCURRENT_REQUESTS = 5 # 最大并发请求数
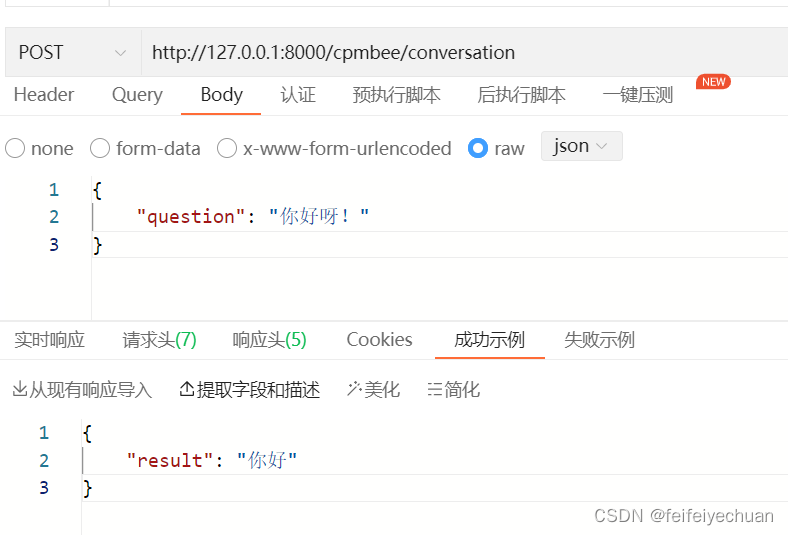
@app.route('/cpmbee/conversation', methods=['POST'])
def conversation():
global counter
# 请求过载,返回提示信息
if counter >= MAX_CONCURRENT_REQUESTS:
return jsonify({'message': '请稍等再试'})
# 获取线程锁
with lock:
counter += 1
try:
# 接收 POST 请求的数据
question = request.json['question']
inference_results = beam_search.generate([
{'question': question, "<ans>": ""}
], max_length=100, repetition_penalty=1.1)
print('inference_results:', type(inference_results), inference_results)
result = inference_results[0]["<ans>"]
print('result:', type(result), result)
# 返回结果
response = {'result': result}
return jsonify(response)
finally:
# 释放线程锁并减少计数器
with lock:
counter -= 1
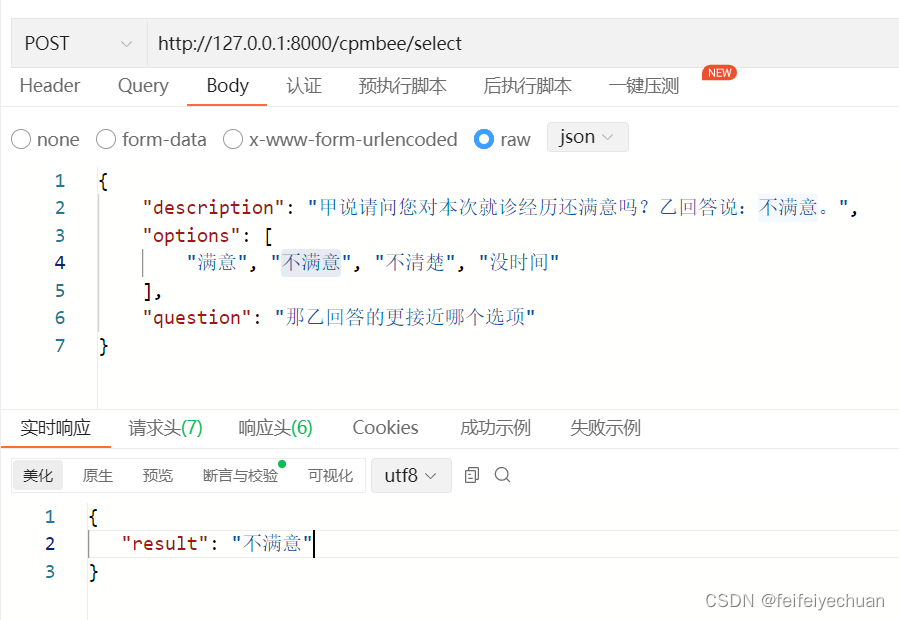
@app.route('/cpmbee/select', methods=['POST'])
def select():
global counter
# 请求过载,返回提示信息
if counter >= MAX_CONCURRENT_REQUESTS:
return jsonify({'message': '请稍等再试'})
# 获取线程锁
with lock:
counter += 1
try:
# 接收 POST 请求的数据
print(request.json)
description = request.json['description']
options = request.json['options']
options_index2option = {'<option_%s>' % str(index): str(option) for index, option in enumerate(options)}
question = request.json['question']
inference_results = beam_search.generate([
{'input': description, 'options': options_index2option, 'question': question, "<ans>": ""}
], max_length=100, repetition_penalty=1.1)
option_result = inference_results[0]["<ans>"]
result = options_index2option.get(option_result, option_result)
# 返回结果
response = {'result': result}
return jsonify(response)
finally:
# 释放线程锁并减少计数器
with lock:
counter -= 1
if __name__ == '__main__':
print("Flask 服务器已启动")
app.run(host='0.0.0.0', port=8000)未避免显存异常,在上述代码中,通过创建一个线程锁 lock 和一个计数器 counter 来控制并发请求的数量。如果请求超过了 MAX_CONCURRENT_REQUESTS 的限制,即达到了最大并发请求数,服务器将返回提示信息"请稍等再试"。
2)启动接口
python flask_server.py3)接口测试
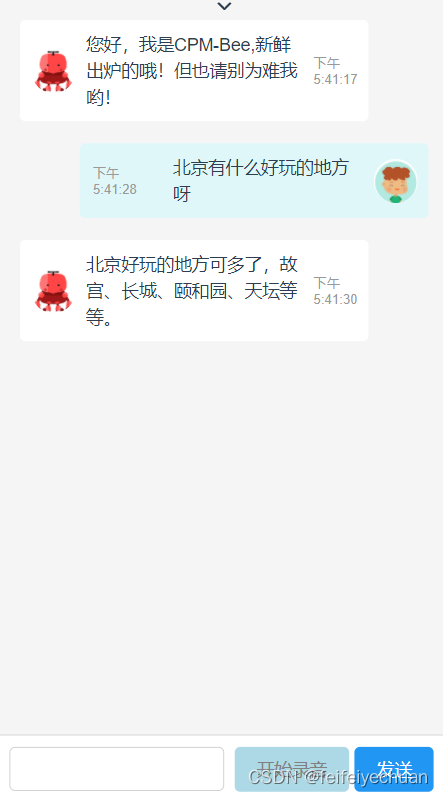
Chat测试
聊天窗口(前后端)
—
➤ 加社群/ 提建议/ 有疑问
请找 OpenBMB 万能小助手:

https://www.openbmb.org
长期开放招聘|含实习
内容中包含的图片若涉及版权问题,请及时与我们联系删除

评论
沙发等你来抢